
1. Introduction
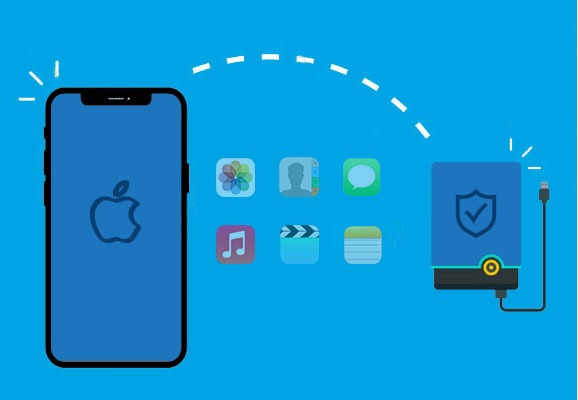
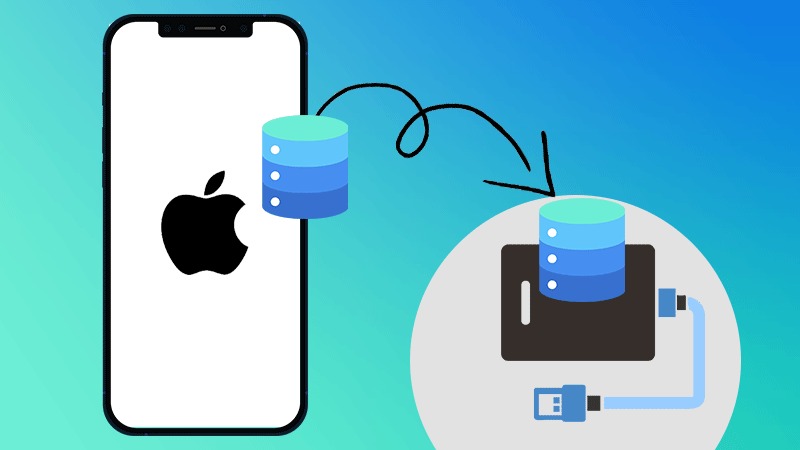
If you’ve ever backed up your iPhone using iTunes on a Windows 10 computer, you’ve probably noticed one big issue — the backups take up a lot of space on your system drive. Over time, these files can eat into your C: drive storage, slowing down your PC and leaving little room for other important files. That’s why many users look for an easier, smarter way to move iPhone backups to an external hard drive.
Using an external drive not only frees up valuable space on your Windows computer, but also adds an extra layer of safety. If your PC ever fails, your backup won’t be lost along with it. Plus, external drives are portable, meaning you can keep your data secure and carry it with you if needed.
In this guide, we’ll show you the easy method to move iPhone backup to an external drive on Windows 10. From locating the default backup folder to creating a symbolic link (symlink), we’ll walk through each step clearly so that even beginners can follow along.
By the end, you’ll have a clean setup where iTunes automatically saves every iPhone backup directly to your external drive — simple, safe, and efficient.
2. Why Move iPhone Backups to an External Drive?
If you’ve ever noticed your Windows 10 PC running out of storage space, there’s a good chance your iPhone backups are part of the problem. Every time you back up your iPhone with iTunes, it creates a large backup folder filled with photos, videos, app data, and settings. For many users, these files can take up tens of gigabytes on the main C: drive — the same drive that Windows needs to run smoothly.
Moving your iPhone backup to an external hard drive is a smart way to solve this problem. External drives typically have much larger storage capacity, so you don’t have to worry about running out of space every time you back up. Plus, it helps your PC run faster by keeping your system drive free of clutter.
Another benefit is safety. If your computer crashes or gets corrupted, your backup on the C: drive could be lost. By storing iPhone backups on an external drive, you add an extra layer of protection. You can even keep multiple copies of your backups on different drives for peace of mind.
Finally, external backups are portable. You can plug the drive into another computer, carry it with you, or store it safely as a dedicated backup device.
In short, moving your iPhone backup to an external hard drive on Windows 10 saves space, improves safety, and makes managing your data much easier — all with just a one-time setup.
3. Default iPhone Backup Location on Windows 10
Before you can move your iPhone backup, it helps to know where Windows 10 actually stores these files. By default, iTunes saves backups in a hidden system folder on your computer’s main drive (usually the C: drive). The full path looks like this:
C:\Users\[YourUsername]\AppData\Roaming\Apple Computer\MobileSync\Backup\
Here’s how to access it quickly:
- Press Windows + R on your keyboard.
- Type %appdata% and hit Enter.
- Navigate to Apple Computer > MobileSync > Backup.
Inside this folder, you’ll see one or more folders with long, random names. Each of these represents a different iPhone backup. The size of these folders can be huge, often several gigabytes, depending on how much data is stored on your iPhone.
If you installed iTunes from the Microsoft Store instead of Apple’s website, the backup location may be slightly different:
C:\Users\[YourUsername]\Apple\MobileSync\Backup\
This default setup works fine for most users, but the problem is that your system drive fills up quickly. Since the Backup folder is buried deep inside Windows, many people don’t even realize how much space it’s taking.
That’s why moving your iPhone backup to an external hard drive on Windows 10 is so useful. It frees up space on your PC and keeps your files organized in a location you control.
4. Step-by-Step: How to Move iPhone Backup to External Drive
Moving your iPhone backup to an external hard drive on Windows 10 may sound complicated, but it’s actually quite simple if you follow the right steps. Below is a detailed guide that walks you through the process.
Step 1: Connect and Prepare Your External Drive
First, plug in your external hard drive to your Windows 10 computer. Make sure it has enough free space to store your iPhone backup, which can often be several gigabytes in size. If the drive is new, format it to ensure compatibility with Windows. Create a dedicated folder on the drive (for example, iPhone_Backups) so your files stay organized.
Step 2: Locate the Current Backup Folder
By default, iTunes stores backups in a hidden folder on your main drive. The path is usually:
C:\Users\[YourUsername]\AppData\Roaming\Apple Computer\MobileSync\Backup\
Navigate to this location by pressing Windows + R, typing %appdata%, and browsing to the folder. Inside, you’ll see one or more backup folders with random names.
Step 3: Copy the Backup to the External Drive
Now, copy the entire Backup folder and paste it into the folder you created on your external drive. Depending on the size, this may take a while. Once copied, double-check that the files are safely stored on the external drive before making any changes to the original folder.
Step 4: Rename or Remove the Original Backup Folder
To prevent confusion, rename the original Backup folder on your C: drive (for example, to Backup_old). This ensures iTunes won’t keep saving new backups to the same location, and it makes room for the next step.
Step 5: Create a Symbolic Link (Symlink)
The key step is redirecting iTunes so that all future backups automatically save to the external drive. To do this:
Open Command Prompt as Administrator.
Enter the following command (replace E:\iPhone_Backups with your external drive path):
mklink /J “C:\Users\[YourUsername]\AppData\Roaming\Apple Computer\MobileSync\Backup” “E:\iPhone_Backups”
This command creates a symbolic link — basically a shortcut that tricks iTunes into using your external drive as the new backup location.
Step 6: Test the Setup
Open iTunes and create a new backup. When it finishes, check your external drive folder to confirm that the new files appear there. If they do, congratulations — you’ve successfully moved your iPhone backup to an external hard drive!
5. Verify the Backup Location
After moving your iPhone backup to an external hard drive on Windows 10, it’s important to make sure everything is working correctly. If the symbolic link wasn’t set up properly, iTunes may still try to save files to the original folder on your C: drive. Verifying the new location ensures your backups are both safe and stored where you want them.
Step 1: Create a new backup in iTunes
Connect your iPhone to your Windows PC and open iTunes. Select your device, then click “Back Up Now.” Wait until the backup process finishes.
Step 2: Check the external drive
Go to the folder you created on your external hard drive (for example, E:\iPhone_Backups). You should see new files or updated timestamps, which confirm that iTunes is now saving backups there.
Step 3: Confirm inside iTunes
In iTunes, go to Edit > Preferences > Devices. You’ll see a list of backups with the date and time. Compare this with the folder on your external drive to ensure they match.
Step 4: Remove old backups (optional)
If everything looks good, you can safely delete the old “Backup_old” folder from your C: drive to free up space.
By taking a few minutes to verify the setup, you’ll know for sure that your iPhone backups on Windows 10 are being stored securely on your external drive — saving space and keeping your data safe.
6. Common Issues and Fixes
While moving your iPhone backup to an external hard drive on Windows 10 is usually smooth, a few common problems can appear. Here’s how to solve them quickly.
1. Backup still saves to C: drive
- Cause: The symbolic link (symlink) wasn’t created correctly.
- Fix: Delete the new Backup folder in AppData > MobileSync and re-run the mklink /J command, making sure you replace the path with your actual external drive location.
2. iTunes doesn’t detect the external drive
- Cause: External drive isn’t connected or has changed drive letters (for example, E: to F:).
- Fix: Reconnect the drive and make sure it has the same letter. You can manually assign a permanent drive letter in Windows Disk Management.
3. “Access Denied” error when creating symlink
- Cause: Command Prompt wasn’t run as Administrator.
- Fix: Right-click Command Prompt and choose Run as Administrator, then try again.
4. Backup process fails midway
- Cause: Not enough free space or unstable USB connection.
- Fix: Free up space on the external drive and ensure you’re using a reliable Lightning cable and USB port.
By addressing these issues, you can ensure that every new iPhone backup on Windows 10 is stored securely on your external hard drive without interruptions. Once set up properly, the process becomes automatic and hassle-free.
7. Expert Tips for Safe External Drive Backups
Once you’ve successfully moved your iPhone backup to an external hard drive on Windows 10, the next step is to make sure your data stays safe and easy to restore. A few smart habits can make a big difference.
1. Use a dedicated drive
If possible, keep one external drive just for backups. This reduces clutter and lowers the risk of accidentally deleting important files.
2. Keep multiple copies
For extra security, consider maintaining two backups — one on your Windows PC and another on the external drive. If one fails, you’ll always have a second copy.
3. Encrypt your backups
When backing up via iTunes or third-party tools, choose the encrypted backup option. This ensures sensitive data like passwords, health info, and app settings are protected.
4. Label and organize your drives
Give your external drive a clear name like “iPhone_Backup” so you don’t confuse it with other storage devices. Create folders for different devices if you back up more than one iPhone.
5. Eject safely
Always use the “Safely Remove Hardware” option before unplugging your external drive. This prevents data corruption and keeps your backups intact.
6. Update regularly
Don’t forget to run backups on a consistent schedule. A backup from six months ago won’t help if you lose new photos today.
By following these expert tips, you’ll ensure your iPhone external drive backup is secure, organized, and ready whenever you need it.
8. Conclusion
Moving your iPhone backup to an external hard drive on Windows 10 is one of the simplest ways to save space on your PC and keep your data safe. Instead of filling up your system drive, your backups are stored securely on a device you control. With just a few steps — copying the backup folder, creating a symlink, and verifying the setup — you can redirect iTunes to always use your external drive.
The benefits are clear: more storage, better safety, and flexibility to carry your backups wherever you go. Add in a few smart habits, like encrypting your data and keeping multiple copies, and you’ll have a backup system that’s both secure and reliable.
Take a few minutes today to set this up, and enjoy the peace of mind that comes from knowing your iPhone data is protected — no matter what happens.
